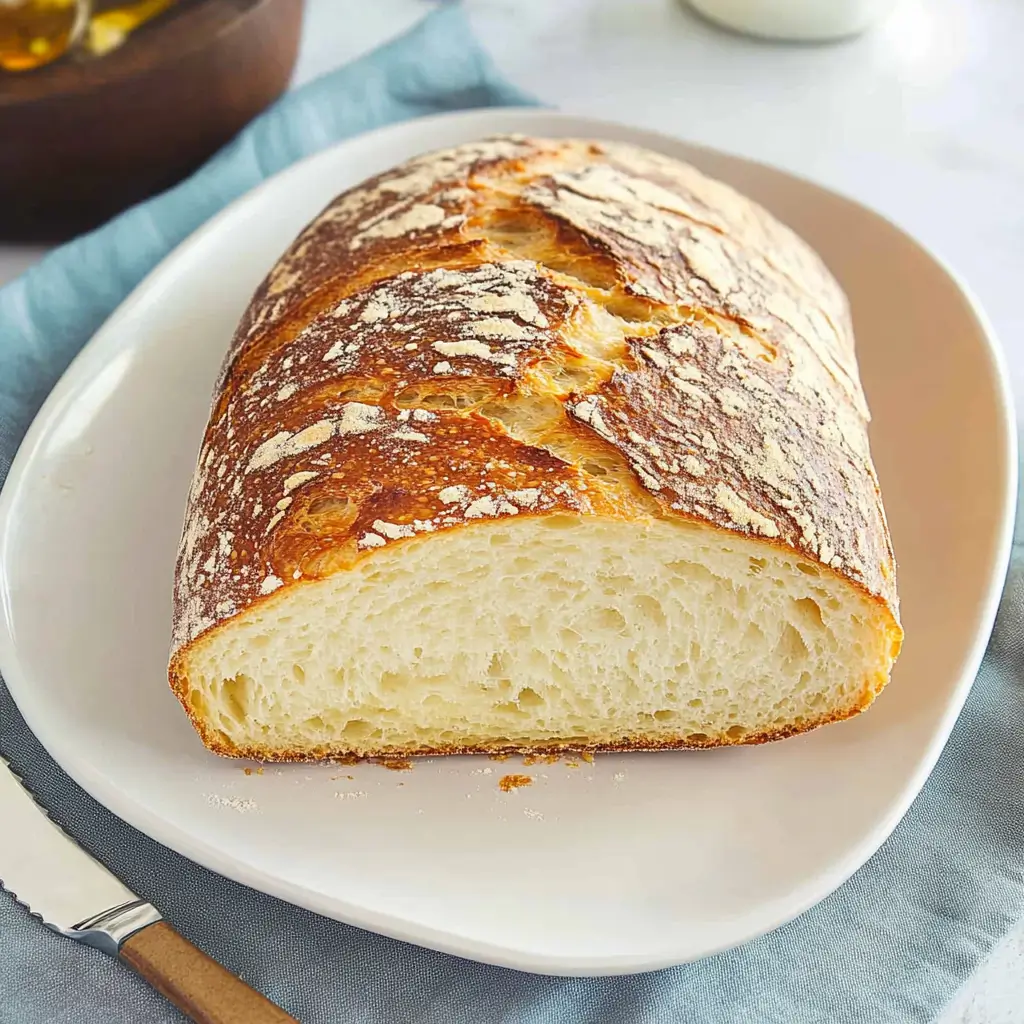
If there’s one thing that embodies the heart of Italian cooking, it’s artisan Italian bread. This crusty, rustic loaf is the perfect companion to soups, salads, or pasta dishes—or even as a standalone delight with olive oil for dipping. Unlike store-bought options, homemade artisan Italian bread is full of character, with a golden, crackling crust and a soft, airy interior.
In this guide, we’ll take you step by step through creating your own loaf. You’ll learn the secrets behind its unique texture, discover versatile variations, and get tips to make baking a breeze. Let’s dive into the art of crafting the perfect Italian bread!
What Makes Artisan Italian Bread Special?
A Taste of Tradition in Every Loaf
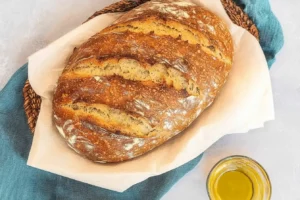
When you think of rustic Italian bread, imagine the kind of bread baked by hand in small villages—simple ingredients, no frills, and a focus on flavor. The word “artisan” reflects its handcrafted nature. It’s not just bread; it’s a tradition.
What sets this bread apart is its emphasis on quality over quantity. It doesn’t rely on complicated machinery or shortcuts. Instead, it uses time and technique to develop its signature airy crumb and crackly crust. The slow fermentation process and minimal ingredients create a loaf that’s rich in texture and taste.
Key Characteristics of Rustic Italian Loaves
- Airy Crumb: The open, irregular holes in the bread are a hallmark of its high hydration dough.
- Golden Crust: Thanks to the steam during baking, the crust is crisp, with a slight sheen that invites you to tear into it.
- Minimal Ingredients: Flour, water, yeast, and salt—sometimes a touch of sugar or olive oil. Each plays a vital role in the bread’s distinct flavor.
Why It’s Perfect for Any Meal
Its versatility is unmatched. You can slice it for sandwiches, toast it for bruschetta, or serve it warm with a drizzle of olive oil and a sprinkle of salt. Whether it’s paired with hearty soup or a fresh Caprese salad, this loaf is the ultimate companion for your meals.
Next, we’ll explore the essential ingredients you need to make this rustic Italian loaf at home.
Essential Ingredients for Artisan Italian Bread
Core Ingredients You’ll Need
To make a perfect loaf of artisan-style Italian bread, simplicity is key. Each ingredient plays a vital role in creating a bread that’s flavorful, airy, and crusty.
- Flour:
- All-purpose flour works well for a balanced texture.
- Bread flour, with its higher protein content, can create a chewier and more elastic crumb.
- Yeast:
- Instant yeast is convenient and doesn’t require pre-proofing.
- Active dry yeast works just as well but needs to be dissolved in warm water before use.
- Warm Water:
- Water hydrates the flour, activates the yeast, and creates steam for a crisp crust.
- Salt:
- Salt enhances the bread’s flavor and regulates yeast activity, preventing overproofing.
- Sugar (Optional):
- A small amount of sugar boosts the yeast’s activity and adds a touch of sweetness to the bread.
Why Ingredient Quality Matters
The quality of your ingredients makes all the difference in the flavor and texture of the bread. For example:
- Using fresh yeast ensures the dough rises well.
- High-protein, unbleached flour creates a sturdier structure with that classic open crumb.
Optional Add-Ins for Flavor Variations
Want to get creative with your bread? Here are a few optional additions to elevate your loaf:
- Herbs: Rosemary, thyme, or oregano can be kneaded into the dough for a fragrant, herbed loaf.
- Cheese: Parmesan or Asiago adds richness and a savory touch.
- Garlic: Incorporate roasted garlic for a bold, earthy flavor.
Next, we’ll dive into the step-by-step process of making crusty Italian artisan bread from scratch. Stay tuned!
Step-by-Step Guide to Making Artisan Italian Bread
Preparing the Dough

Creating artisan Italian bread is simpler than it sounds. With minimal effort and a little patience, you can make a loaf that rivals bakery-quality bread.
- Mixing the Ingredients:
- In a large bowl, combine 3 ½ cups of flour, 1 teaspoon of salt, 1 teaspoon of sugar (optional), and 1 packet of instant yeast (2 ¼ teaspoons).
- Slowly incorporate 1 ½ cups of warm water (approximately 110°F) while mixing with a wooden spoon or your hands until a sticky dough is created.
- Letting It Rest:
- Cover the bowl with plastic wrap or a damp kitchen towel.
- Allow the dough to rest and rise for 2-2.5 hours at room temperature. The dough should double in size and look bubbly.
Shaping and Proofing
Once the dough has risen, it’s time to shape it into the perfect loaf.
- Shaping the Dough:
- Transfer the dough onto a floured surface. Use lightly floured hands to shape it into a round or oval loaf.
- Avoid overworking the dough to maintain its airy texture.
- Proofing:
- Place the shaped dough onto parchment paper and cover it loosely with a towel.
- Let it rest for another 30-40 minutes to allow the dough to rise slightly before baking.
- Scoring the Loaf:
- Utilize a sharp knife or bread lame to create several shallow slashes on the surface of the dough. These incisions assist in managing the bread’s expansion while it bakes and provide a decorative element.
The Baking Process
This step transforms your dough into a beautiful, crusty loaf.
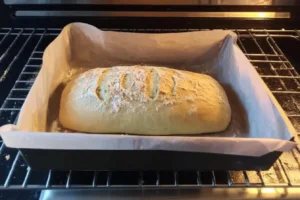
- Preheating the Oven:
- Preheat your oven to 450°F (230°C). Place a baking sheet or pizza stone on the middle rack and a shallow pan on the bottom rack.
- Adding Steam:
- Right before placing the bread in the oven, pour 1 cup of hot water into the shallow pan to create steam. This step ensures a crispy, golden crust.
- Baking the Bread:
- Slide the parchment paper with the dough onto the preheated baking sheet or pizza stone.
- Bake for 25-30 minutes, or until the crust is golden brown and the bread sounds hollow when tapped on the bottom.
- Cooling:
- Transfer the bread to a wire rack to cool completely before slicing. This step allows the crumb to set and prevents it from becoming gummy.
Next, we’ll explore creative variations and serving suggestions to elevate your homemade Italian artisan bread.
Creative Variations and Flavor Enhancements
Adding Your Own Twist to the Recipe
While the classic version is delicious on its own, you can experiment with different flavors and ingredients to create unique loaves.
- Herbed Bread:
- Add chopped fresh herbs like rosemary, thyme, or basil to the dough for a fragrant, savory loaf.
- Sprinkle dried oregano or Italian seasoning on top before baking for an aromatic crust.
- Cheesy Loaves:
- Fold shredded Parmesan, Asiago, or mozzarella into the dough for a cheesy interior.
- Top the dough with grated cheese before baking to create a crispy, golden crust.
- Garlic and Olive Bread:
- Mix in roasted garlic or finely chopped olives for bold flavors.
- Drizzle the finished loaf with olive oil for a rustic touch.
- Sweet Variations:
- For a sweeter take, knead in dried fruits like raisins or figs.
- Incorporate a blend of cinnamon and sugar into the dough for a morning-friendly treat.
Serving Suggestions for Every Occasion
This versatile bread can enhance any meal, from casual breakfasts to festive dinners.
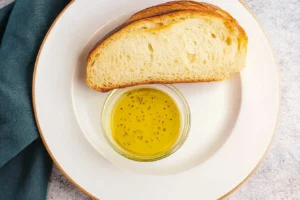
- Simple Pairings:
- Serve warm slices with butter or olive oil for dipping.
- Pair with soups, stews, or pasta dishes for a hearty side.
- Use in Recipes:
- Make bruschetta with fresh tomatoes, basil, and balsamic glaze.
- Use as a base for sandwiches or paninis, adding layers of fresh veggies, meats, or cheese.
- Seasonal Ideas:
- Create holiday stuffing with cubes of the bread.
- Use toasted slices for crostini appetizers during gatherings.
Next, we’ll cover how to store and freeze your homemade bread to keep it fresh for longer.
How to Store and Preserve Your Bread
Keeping Your Loaf Fresh for Days
Proper storage ensures your bread stays delicious and maintains its texture. Follow these tips to enjoy your loaf to the fullest:
- Room Temperature Tips:
- Cover the bread with a clean kitchen towel or put it in a paper bag to safeguard its crust while keeping it from becoming stale.
- Refrain from wrapping it in plastic or using airtight containers, as this can make the crust lose its firmness.
- Short-Term Storage Solutions:
- For the best taste and texture, consume the bread within 2 days of baking.
Why You Should Skip Refrigerating Bread
Refrigeration can dry out the crumb and make the bread lose its signature texture. If you need to store it for longer, freezing is a much better option.
Freezing for Long-Term Freshness
Freezing allows you to enjoy your homemade bread weeks later without sacrificing quality:
- Storing a Whole Loaf:
- Ensure the bread has cooled completely before wrapping it tightly in plastic wrap and a layer of aluminum foil.
- Freeze for up to 3 months.
- Freezing Individual Slices:
- Slice the loaf before freezing, separating the pieces with parchment paper to prevent sticking.
- Store the slices in a freezer-safe bag for easy access to single portions.
Reheating Frozen Bread
Bring your bread back to life with these simple reheating methods:
- For Whole Loaves:
- Thaw the bread at room temperature for a few hours.
- Place it in a 300°F oven for 10–15 minutes to restore its crisp crust.
- For Slices:
- Toast slices straight from the freezer for a quick snack or meal.
Up next, we’ll answer common questions about making and storing rustic Italian loaves. Stay tuned!
Frequently Asked Questions (FAQs)
1. Can I use active dry yeast instead of instant yeast?
Yes, you can substitute active dry yeast for instant yeast. Simply dissolve the active dry yeast in warm water with a pinch of sugar and let it sit for 5–10 minutes until frothy before adding it to the dough.
2. Why is my dough so sticky?
Sticky dough is common with high-hydration recipes like artisan bread. It’s essential for achieving the airy texture and open crumb. Use lightly floured hands when shaping the dough, but avoid adding too much extra flour, which can make the bread dense.
3. How can I make the crust crispier?
A crispy crust is achieved by baking with steam. Place a pan of hot water on the lower oven rack or spray the oven walls with water before closing the door. This helps create a golden, crackly crust.
4. Can I make this bread gluten-free?
Yes, but you’ll need a gluten-free flour blend specifically designed for bread baking. The texture and rise may differ from traditional bread due to the lack of gluten, so it’s best to follow a gluten-free artisan bread recipe for optimal results.
5. How do I know when my bread is done baking?
The best way to check is by tapping the bottom of the loaf. If it sounds hollow, it’s ready! You can also use a thermometer to ensure the internal temperature reaches around 200–210°F.
6. What’s the best way to slice the bread?
Wait for the bread to cool completely before slicing to avoid a gummy texture. Use a serrated knife for clean, even cuts.
Conclusion
Baking artisan Italian bread at home is a rewarding experience that brings authentic flavors and rustic charm right to your kitchen. With its crispy crust, airy crumb, and endless versatility, this bread is perfect for any occasion—from everyday meals to special gatherings.
Why wait to try it yourself? Collect your ingredients, adhere to the instructions, and relish the fulfillment of crafting bread that is both tasty and visually appealing. Remember to share your baked goods and motivate others to experience the pleasure of baking!
Ready to bake your first loaf? Let’s get started today!